AI tools are evolving at a breakneck pace. Just a few months ago, I was patching together code snippets from various models like ChatGPT and Gemini, often using early versions of tools like Cursor, just to build simple things.
Fast forward to today, and it’s a different story: this website was built and deployed largely by autonomous agents. Believe it or not, I didn’t write a single line of the code myself.
So how did I go about this? 🤯
My process involved these 4 main stages 🎢:
- Brainstorming & Planning
- Prototyping
- Building
- Deployment
Stage 1: Brainstorming & Planning with Gemini 🧠💭
Even though AI agents wrote all the code, the initial thinking and planning needed a lot of my inputs. I used Gemini in this phase to:
- Brainstorm on the site’s purpose and feel.
- Figure out a logical structure for the content and pages.
- Get some technical suggestions based the above (like using Astro.js).
- Draft some basic content guidelines
Stage 2: Prototyping the Structure ✏️📐
For the prototyping stage, I used Gemini again, this time pushing it to generate actual code outputs:
- Produced two different HTML prototypes directly from our planning discussions.
- These weren’t just visual mock ups, but actual HTML files providing a tangible structure.
- Gave the coding agents a concrete starting point beyond just the conceptual plan.
Here are screenshots of the building process:
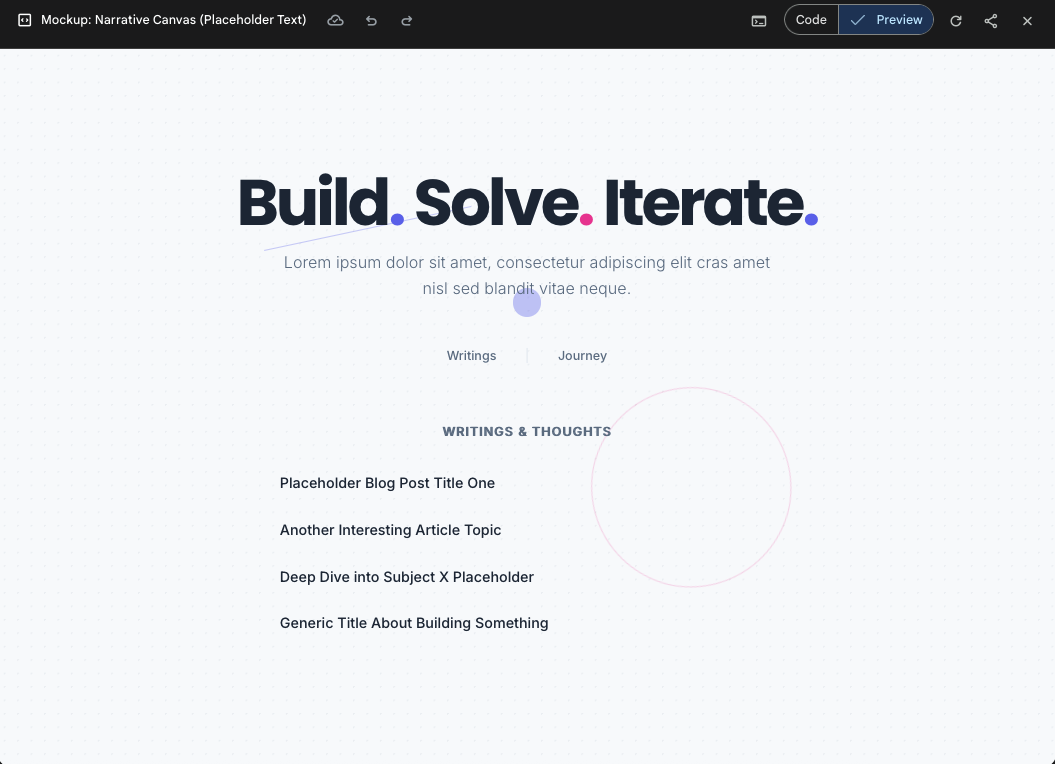
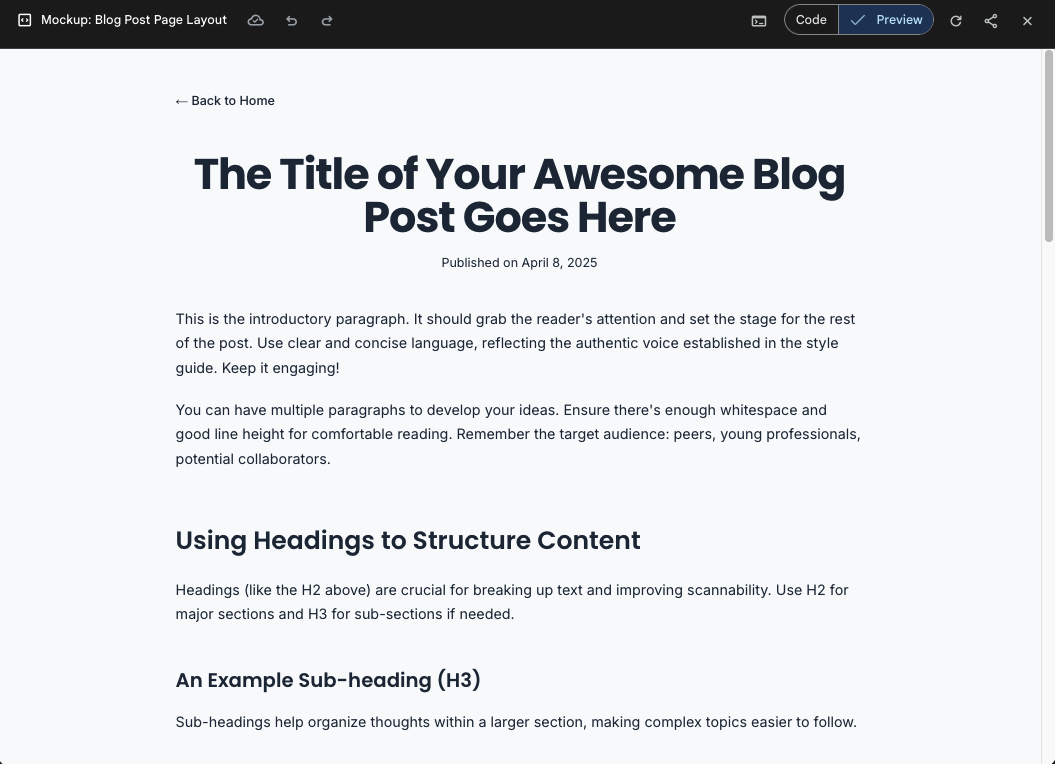
Stage 3: Building with AI Agents 💻🤖
Okay, prototypes done, now for the main event: the build. This felt like the biggest leap from old workflows. Working within the Windsurf IDE, my role shifted to directing Cline, the autonomous coding agent:
- I fed Cline the HTML prototypes and instructed it to translate them into a proper Astro.js site.
- I also had Cline set things up so I could just write blog posts (like this one!) as simple Markdown files, taking advantage of Astro’s built-in content features.
- To keep the build process on track, I even had Cline generate a checklist of the main tasks for us to follow.
- It was pretty cool watching it handle the styling and responsiveness – under the hood, it used OpenRouter to tap into models like Gemini 2.0 Flash, Gemini 2.5 Pro, Gemini 2.0 Thinking and DeepSeek V3, picking the right one for the job.
Here were the specific instructions I gave Cline to guide the build process:
# Instructions for building the personal website

1. **Setup Basic Rules:**
    * I am a front-end developer.
    * I have instructions in `index.html` and `blog.html`.
    * I am building a personal website with a home page and blog pages.
    * Blogs should be fetched from GitHub repositories.
    * The site is built on Astro.js. Keep the dev server running and refresh after major changes.
    * Take human feedback at all steps.
    * Commit to GitHub after a working version is achieved.

2. **Initial Setup:**
    * Ensure Astro.js is set up correctly.
    * Verify `index.html` and `blog.html` are in the correct directories.
    * Confirm Tailwind CSS is configured properly.

3. **Home Page (`index.html`):**
    * Review the existing structure and styling.
    * Ensure the links in the navigation (`Musings`, `Journey`) are correctly pointed.
    * Implement the musings loading logic.

4. **Blog Pages (`blog.html`):**
    * Review the existing structure and styling.
    * Set up dynamic musings post generation using Astro.js.
    * Implement the logic to fetch blog content from GitHub repositories.

5. **GitHub Integration:**
    * Research and implement the best approach to fetch blog content from GitHub repositories.
    * Handle authentication and data fetching securely.
    * Implement error handling for GitHub API requests.

6. **Astro.js Development Server:**
    * Keep the Astro.js development server running during development.
    * Monitor for errors and warnings in the console.
    * Refresh the browser after each major change to ensure the site works as expected.

7. **Human Feedback:**
    * Present the website to the user at each step and incorporate their feedback.
    * Address any issues or concerns raised by the user.

8. **GitHub Commits:**
    * Commit changes to GitHub after each working version is achieved.
    * Use clear and descriptive commit messages.

9. **Final Touches:**
    * Review the website for any remaining issues.
    * Optimize performance and accessibility.
    * Deploy the website to a hosting provider.
The feeling was less about writing code line-by-line, and more about guiding the agent as it automated the construction of the site based on my plan.
Stage 4: Deployment 🎬🚀
Getting the site live felt surprisingly smooth, thanks to the automated workflow:
- To kick things off, I had Cline push the code it had generated to a new repository on GitHub, likely following the checklist we’d established.
- Next, I connected this GitHub repo to Netlify, configuring it for continuous deployment – meaning Netlify would automatically build and deploy any changes pushed to GitHub.
- What really streamlined things was having Cline handle the Git commits and pushes directly; any updates we made could trigger a live deployment automatically.
Challenges 🧗♂️💥
While building with Cline was largely fun and productive, we did encounter some limitations:
- As the context window grew larger, Cline sometimes struggled to maintain coherence
- We occasionally went in circles before realizing we needed to take a step back
- Some tasks required breaking down into smaller, more manageable steps
- The iterative nature meant occasionally needing to re-explain the overall goal
Conclusion �✨
Despite these challenges, this website stands as a practical example of what’s possible with today’s AI agentic workflows. Going from idea to a deployed site, without writing the code myself, shows how far these tools have come beyond simple snippet generation. Coming up next - how I built an Android App in a similar fashion.